Quick Start Guide
Getting started guide to run Quick Instruments
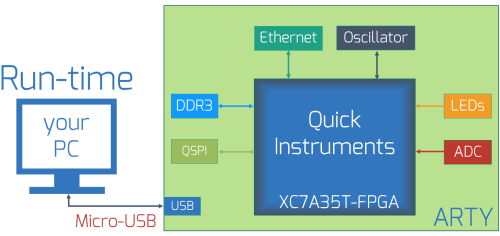
This guide describes how to download, install and use Quick Instruments platform with a simple working example. Complete the steps described in this page and in about 5 minutes you will learn how to execute tests with Quick Instruments Runtime.
Before you start
Prerequisites:
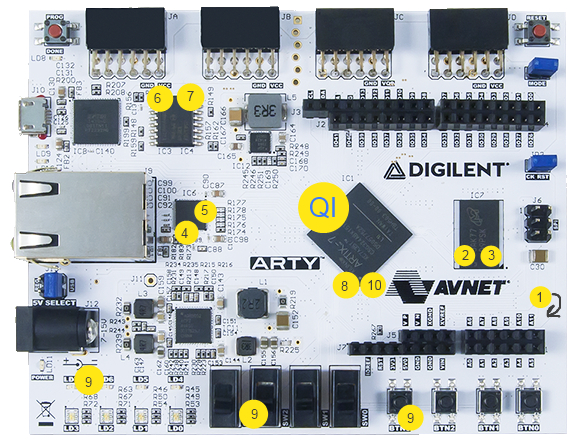
- Digilent Arty Development Board is required to run this demo
- Digilent Arty Development Board is required to run this demo
Overview
This demo covers the following instruments:
- Frequency counter
- Memory Interconnect Tester
- DDR Margining Tester
- Ethernet Basic Tester
- Ethernet Stress Tester
- SPI Tester
- SPI Flash Programmer
- ADC Measurement
- PinTouch
- SVF Player
The setup for the demo:
Downloading QI Runtime
In order to download Quick Instruments Runtime software, please go to the "Resources" -> "Downloads" section.
Then, press "Download Runtime" button.
Then, press "Download Runtime" button.
Installation
After the download is complete, install the QI Runtime to your hard disk. By default, the Quick Instruments are installed to
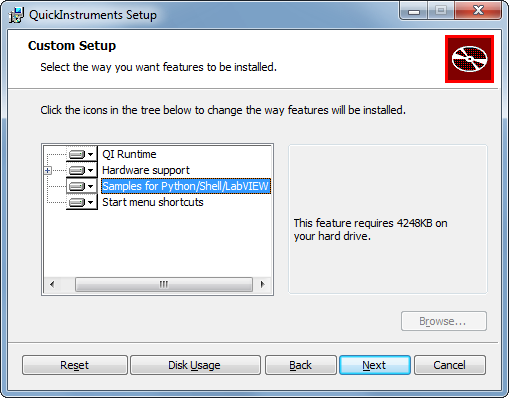
For this demo, it is necessary to install the samples that come with the installer.
"C:/Testonica/QuickInstruments" folder. For this demo, it is necessary to install the samples that come with the installer.
Installing drivers
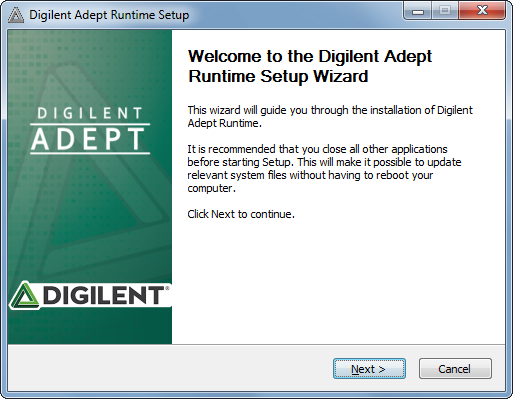
In this demo, Digilent drivers are used for communication between host (PC) and QI Embedded Instruments. To install hardware drivers, go to the QI "Downloads" webpage and download "Digilent" drivers. After the download is complete, install "Digilent Adept Runtime" to your hard disk.
Connecting the board
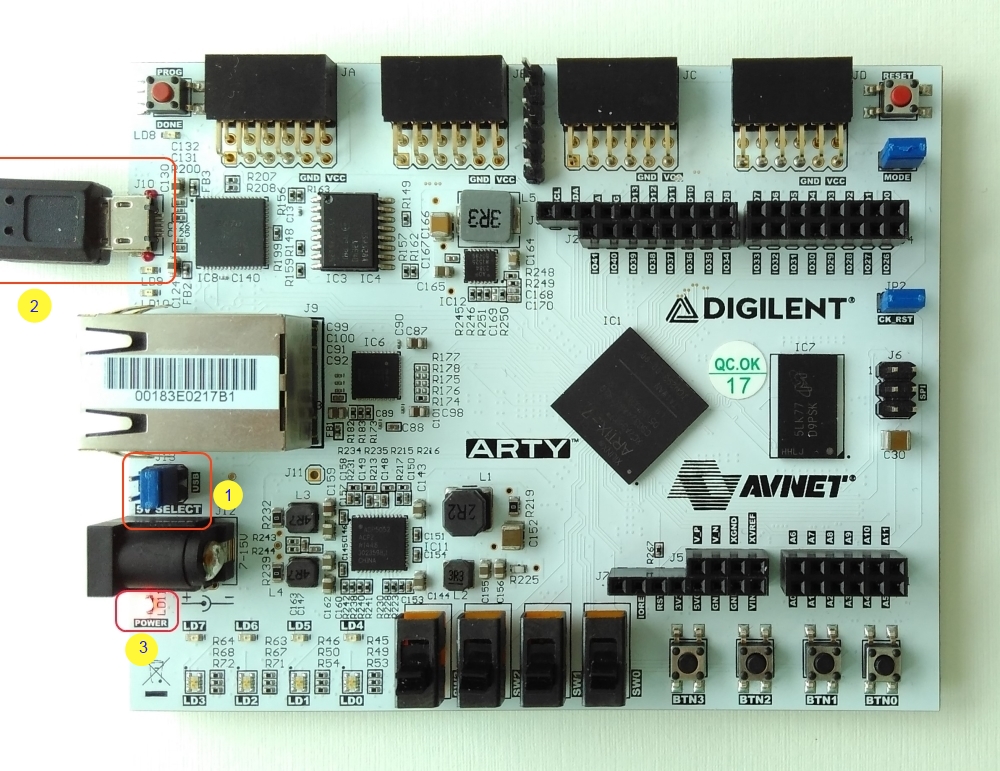
- Make sure that the '5V Select' jumper (J13) is set to USB
- Connect the board to your PC with micro-USB cable
- Check that the 'Power' led (LD11) is lit
- Verify that your OS has installed Digilent drivers properly
Running a simple Demo Program
Note!
- This guide uses Python scripting language to run QI. Basic knowledge of the Python is advantageous but not required.
- NI Teststand, Labview or C# can be used in a similar way. The information how to use other execution platforms can be found here.
- This guide uses Python scripting language to run QI. Basic knowledge of the Python is advantageous but not required.
- NI Teststand, Labview or C# can be used in a similar way. The information how to use other execution platforms can be found here.
- Go to the Quick Instruments installation folder (by default
"C:/Testonica/QuickInstruments") and open "Projects" -> "Demo" -> "ARTY-A7-demo" folder - Run
cmdshortcut, the Command Prompt window should open and target the current folder
- Run demo program by executing the command:
C:\Testonica\QuickInstruments\python311\python.exe Demo.py
- That's it! You have just measured the frequency of oscillator (
IC2) located on your board.
A brief look at the program code
While we are still in the "Python" folder, open "Demo.py" file with any text editor and take a look at the program.
driver = TestbusController("Digilent") #Set up controller
testbus = Testbus(System.Array[str](['IC1:xc7a35t_csg324']), driver) #specify test bus
testbus.IpLibrary = "../Samples/ARTY_MAIN.ipl" #specify instrumentation library for the project

if testbus.Check() : #check infra
	freq = Frequency(testbus) #Define instrument
	value = freq.Measure("IC1.IO_E3", int()) #Perform measurement

	driver.Close() #CLEAN-UP
The code of the program is pretty simple and can be divided into three main sections:
- Define main parameters for the project (controller / devices in test bus / IP library)
- If infrastructure is ok, then start test program
- Close the controller in the end
Running an extended Demo Program
An extended demo program demonstrates the feasibility of Quick Instruments to test printed circuit boards.
Have a problem running this code? Send us an email and we'll do our best to help you: qi@testonica.com
- If you have closed Command Prompt, open it again in "Projects" -> "Demo" -> "Arty-A7-demo" folder
- Run extended demo program by executing the command:
C:\Testonica\QuickInstruments\python311\python.exe ARTY_A7.py
- The program will run the instruments one by one and generate the demo report in the end of execution (see "testReport.html" in your folder)
- You can also run only one test at a time. Call
Arty_A7.py -hto get a list of tests. Then, runArty_A7.py -t Nwhere N is a number of a test for execution
Have a problem running this code? Send us an email and we'll do our best to help you: qi@testonica.com
What's next
- Try to run demo program using C#, NI TestStand or Labview. The demos for these solutions are also provided with the QI Runtime (see Samples folder)
- Explore the documentation center. There is plenty of interesting information about Quick Instruments platform.
- Contact us to find out how Quick Instuments may help in your project or request a demo!